Posts

Showing posts from February, 2021

University Application and Grimsby Interview

Image
  University Application and Grimsby Interview: After writing my personal statement in November 2020, I started to apply for university by filling in the application form on UCAS and I filled in as much information as possible on my own including my personal details, my qualifications, courses I was applying for, etc. I then sat with my mam to check over all of the information I had put in to make sure it was correct and to see if I needed to change anything and after checking over it, I paid for my application and sent it off on the 20 th of November 2020. Overall, I found the application process quite easy as I followed the steps and advice given by Carol Race. I applied for Bolton as my 1 st choice and I applied for this course as it applied to me the most and helps us develop previous skills and teach us new skills such as making makeup work with CGI and creating bigger pieces. I then applied for Grimsby as my 2 nd choice as it is still very appealing, however, there’s a ...

Paint Practice and Makeup Steps

Image
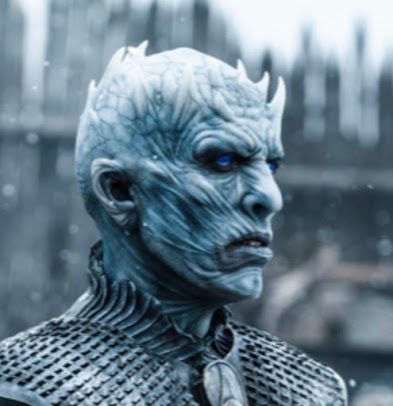
  Paint Practice and Makeup Steps: Today I practiced some paint work using different colours as base colours to see how the different base colours would look with the shading, I used 3 different base colours and blended some black to create the contours. These are my pictures: I will use the blue or the middle colour to create my final makeup as these gave me my most desired results. Steps: Step 1: Apply the bald cap and blend the edges into the skin. Step 2: Apply the ear prosthetics and blend them into the skin. Step 3: Apply the eyebrow and nose prosthetics and blend these into the skin. Step 4: Apply the cheek and chin prosthetics and blend these into the skin. Step 5: apply the neck pieces and blend then apply the horns if they’re not already attached to the bald cap. Step 6: Powder everything to remove any shine. Step 7: Add the base colour all over the face, ears, neck, and bald cap then begin using a very small amount of black to start shading the look...

Prosthetics Making and Experimentation

Image
  Prosthetics Making and Experimentation: 15 th February 2021: Today I used my sculptures to create the rest of my prosthetics. These are my right ear prosthetics: These are my face and chin prosthetics: They will be separated before being put on the face. These are my eyebrow prosthetics: These are my nose prosthetics:  17 th February 2021: Today I began experimenting with my prosthetics and loosely applied them to the face to get a vague idea of how they will look on the face. I applied an earpiece, cheek and nose piece to the face and practiced painting them. This is the earpiece: This ear prosthetic fit really well, however, the paint could be slightly more blended to prevent the colours appearing blocky. This is the cheek piece: The paint could have been slightly more blended, and I could use a smaller brush to shade the grooves as the lines are too thick. This is the nose: The nose fits really well but I could use cotton underneath to prevent ...

Finishing Sculpting

Image
  Finishing Sculpting: I spent Thursday and Friday to finish my sculpting which included the rest of the sculpting on the face cast, the ears, nose, and neck pieces. This is my face sculpture: This is my nose sculpture: These are my ear sculptures: This is my neck sculpture: After completing my sculpting, I began making my prosthetics. These are my neck and left ear prosthetics:

Starting the Prosthetic Experimentation

Image
  Starting the Prosthetic Experimentation: 9th February 2021: Today I finished my small designs for the experimental pieces. These are the rest of my designs: I then started to sculpt clay on a board for the flat cheek prosthetic experimentation and then I created 3 sets of prosthetics for the experiments. This is my sculpture and prosthetics: 10 th February 2021: Today I began the process of sculpting the clay on the cheeks of the face cast. This is my sculpture:

Bald Cap and Beginning the Experimental Process

Image
 8th February 2021  Bald Cap and Beginning the Experimental Process: Today I began experimenting by mixing some colours to get my desired base colour as I don’t have a white alcohol paint for the base, and I created some colour swatches on my arm to help see the colours. These are my colour swatches: I then created a bald cap:

Beginning the Design Process

Image
  Beginning the Design Process: I analysed pictures of the Night King makeup, these pictures included pictures of the bust created to showcase the design and the makeup once it was applied. I then began to write which sections the prosthetics would be used mostly and decided to start the designs that I would make using the face cast, I constantly looked at pictures of the makeup from different angles when creating these first 3 designs to make sure they looked as close to the makeup I could make them. I used a regular pencil for this as the makeup is black, grey, and white and I have given a slight grey hue to my whole designs so that they stand out from the rest of the page even though this will not be needed when I experiment or complete the makeup. These are the main 3 images I used for reference when completing these designs: I decided to create my designs for the separate prosthetics rather than drawing the whole makeup 3 times for my 3 different experimental techniques....